I was taking photos at Marian Valley for their website, which I am updating. Not going to share those photos here, but while doing so, I took some of the other things that took my fancy. Here are a few of them.
Wildlife
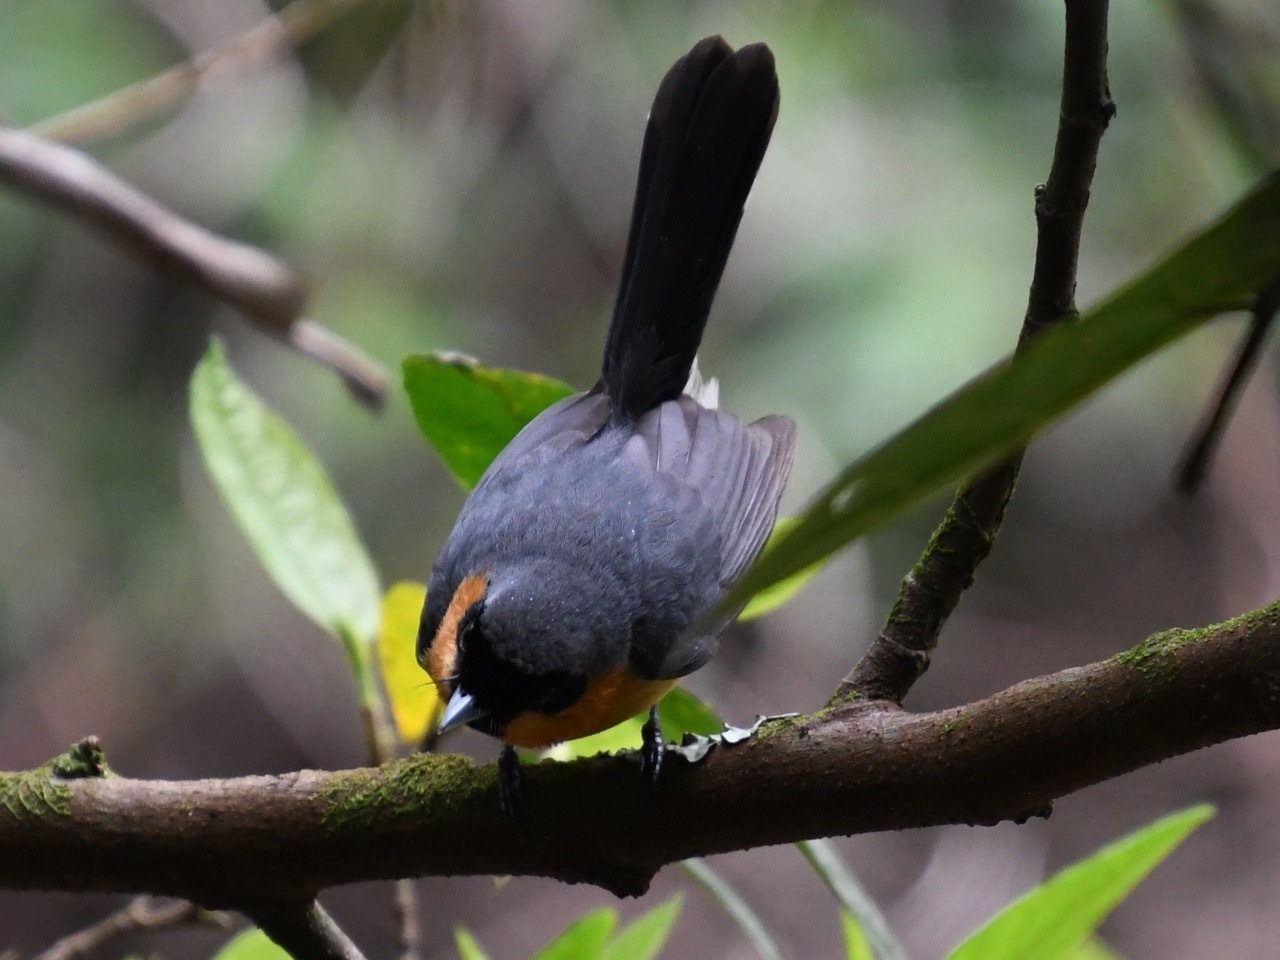
Butcher BirdKookaburraWallabyRufus Whistler
I would have liked to get a few more good photos of some birds, particularly the Rufus Whistler (I had help working out what it was). But they don’t stay still very long. But getting a good bird shot would not be half so rewarding if they did.
The Waterfall and Creek
The Creek at Marian ValleyWaterfallWaterfall
I sat around for a while, taking photos of the little waterfall at different shutter speeds. You can see the difference in the effect if you compare the two images.
The Landscape
The forest around the walking trailThe forest around the walking trailView from the top of the Mountain
The walking trail around the place has a view at the top that is worth the climb, and the way down the forest that I was walking through is beautiful.
Plants
BromeliadsBromeliadsBromeliadsFungusStaghorn fern
Just a few plants (I know fungi are not plants) that were good-natured enough, unlike the birds, to stay still while I took photos of them.
Photography is something that I enjoy but don’t get time or opportunities to do nearly as much as I would like. So what I want to share here is an area of photography that is growing in popularity, making 360° Panoramic VR Photos. Have a play with the above, you can move around in any direction, left-right, up-down, and move between the images.
You can even do this on your phone these days, but the chances are the results will not be optimal. For that, the focal point of your camera lens needs to be perfectly stationary as you take the photos.
The Setup
My setup is this. I got a Nikon D3100 (the entry-level DX model from 12 years ago) and a tripod with a special bracket for these photos. The bracket allows me to rotate the camera around the focal point of the lens. This is important, as mentioned before, to avoid parallax (where things in the foreground move relative to objects in the background). With the lens you choose, the lower the focal length of the lens, the fewer photos you will need. Mine is 10-24mm, which requires a minimum of 16 pictures, 8 angled up every 45° (again, the bracket helps with this) and another 8 angled down. You can also do a final one pointing straight up.
There are some other things to pay attention to. You need to keep the focus and lighting consistent between shots, so with a DLSR, that means turning everything to manual mode. The aperture needs to be closed down as much as possible to get everything in focus, so the shutter speed often needs to go right up. I remember doing some photos in a church with a 2-second shutter speed.
Merging the Photos
To give an idea of the result of the photo shoot, you end up with a set of photos like the ones below for each location where you took the photos.
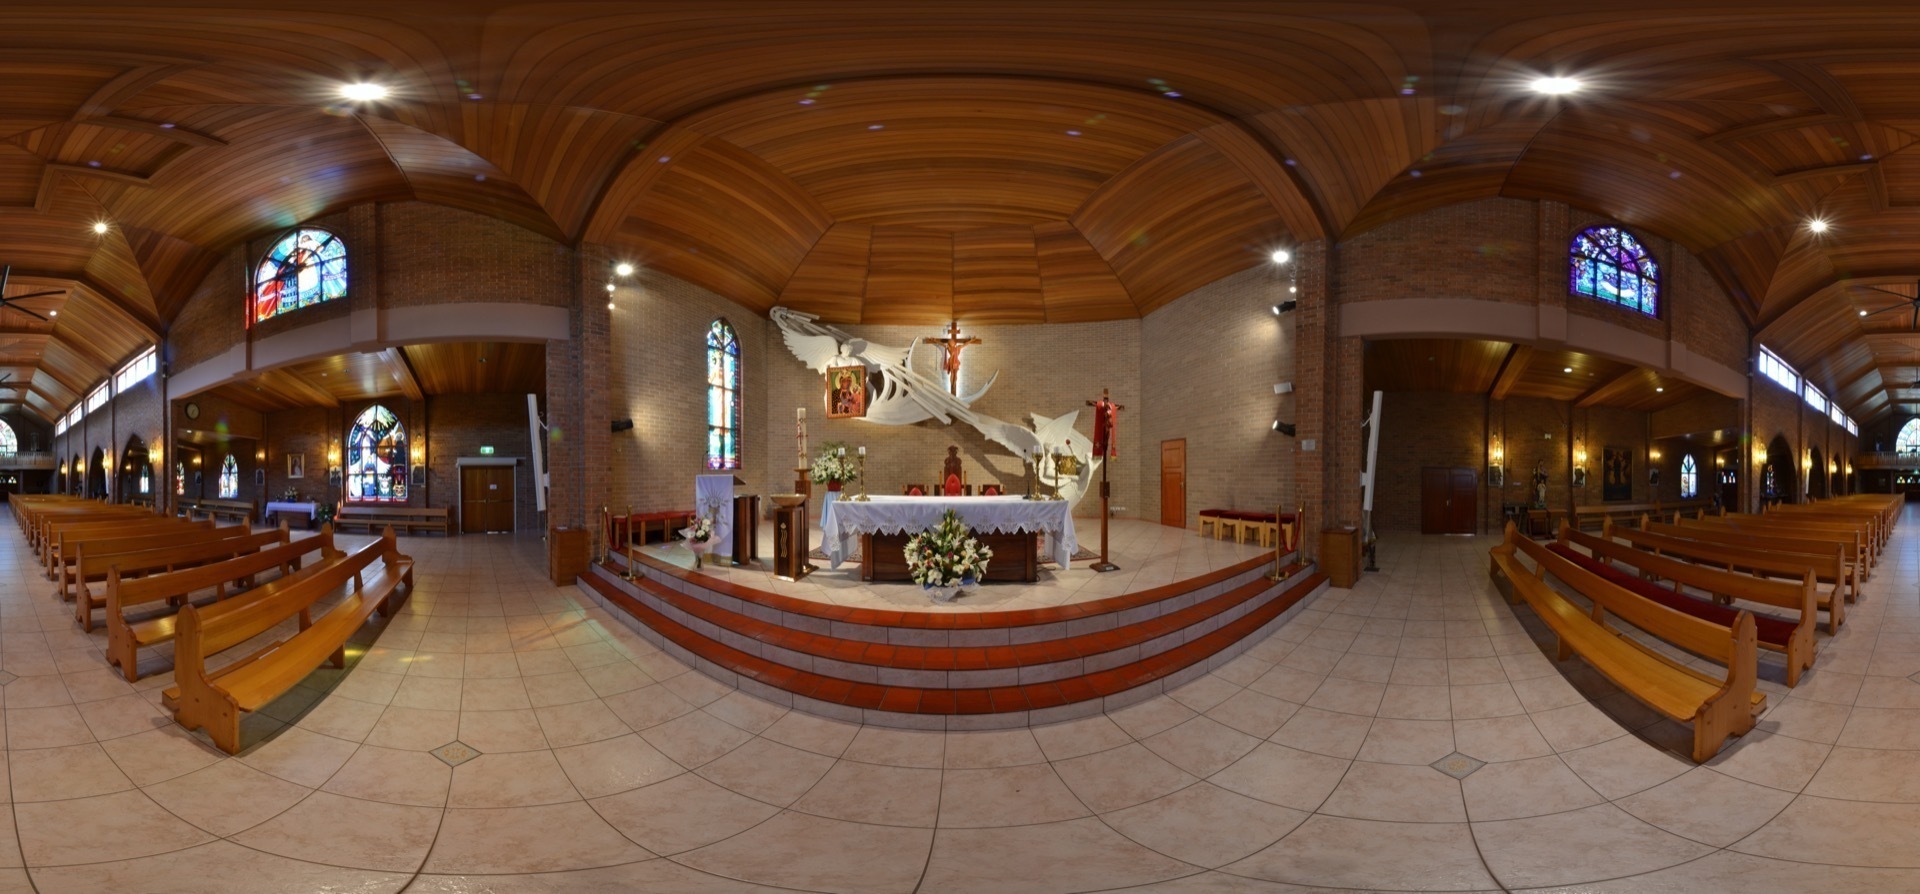
This is, of course, not what you want to share. So all these photos need to be merged into a single equirectangular image. For that, a program like 3DVista Stitcher 4, to name the one I have, is required. It takes the photos and tries to match them up. Sometimes it needs help if, for example, there is a large area of solid colour, but it makes that relatively simple. The result is then a single large photo. With the setup that I am using, it comes to about a 72MP image.
Publishing the Final Photo
The easiest way to share these photos is then on Google Street view. You can import them into the mobile app, fill in some details and publish them.
Other options are becoming more available, which is what started this post. I took these photos I was showing off here over four years ago, but I am comparing solutions for putting them online without Google Street View. I would also like to add more to the tour that is put together than what Google allows for. I have found a solution I like and have used above. Just not sure I can afford the pro version (the free limits to a very small number of images). Sigh…