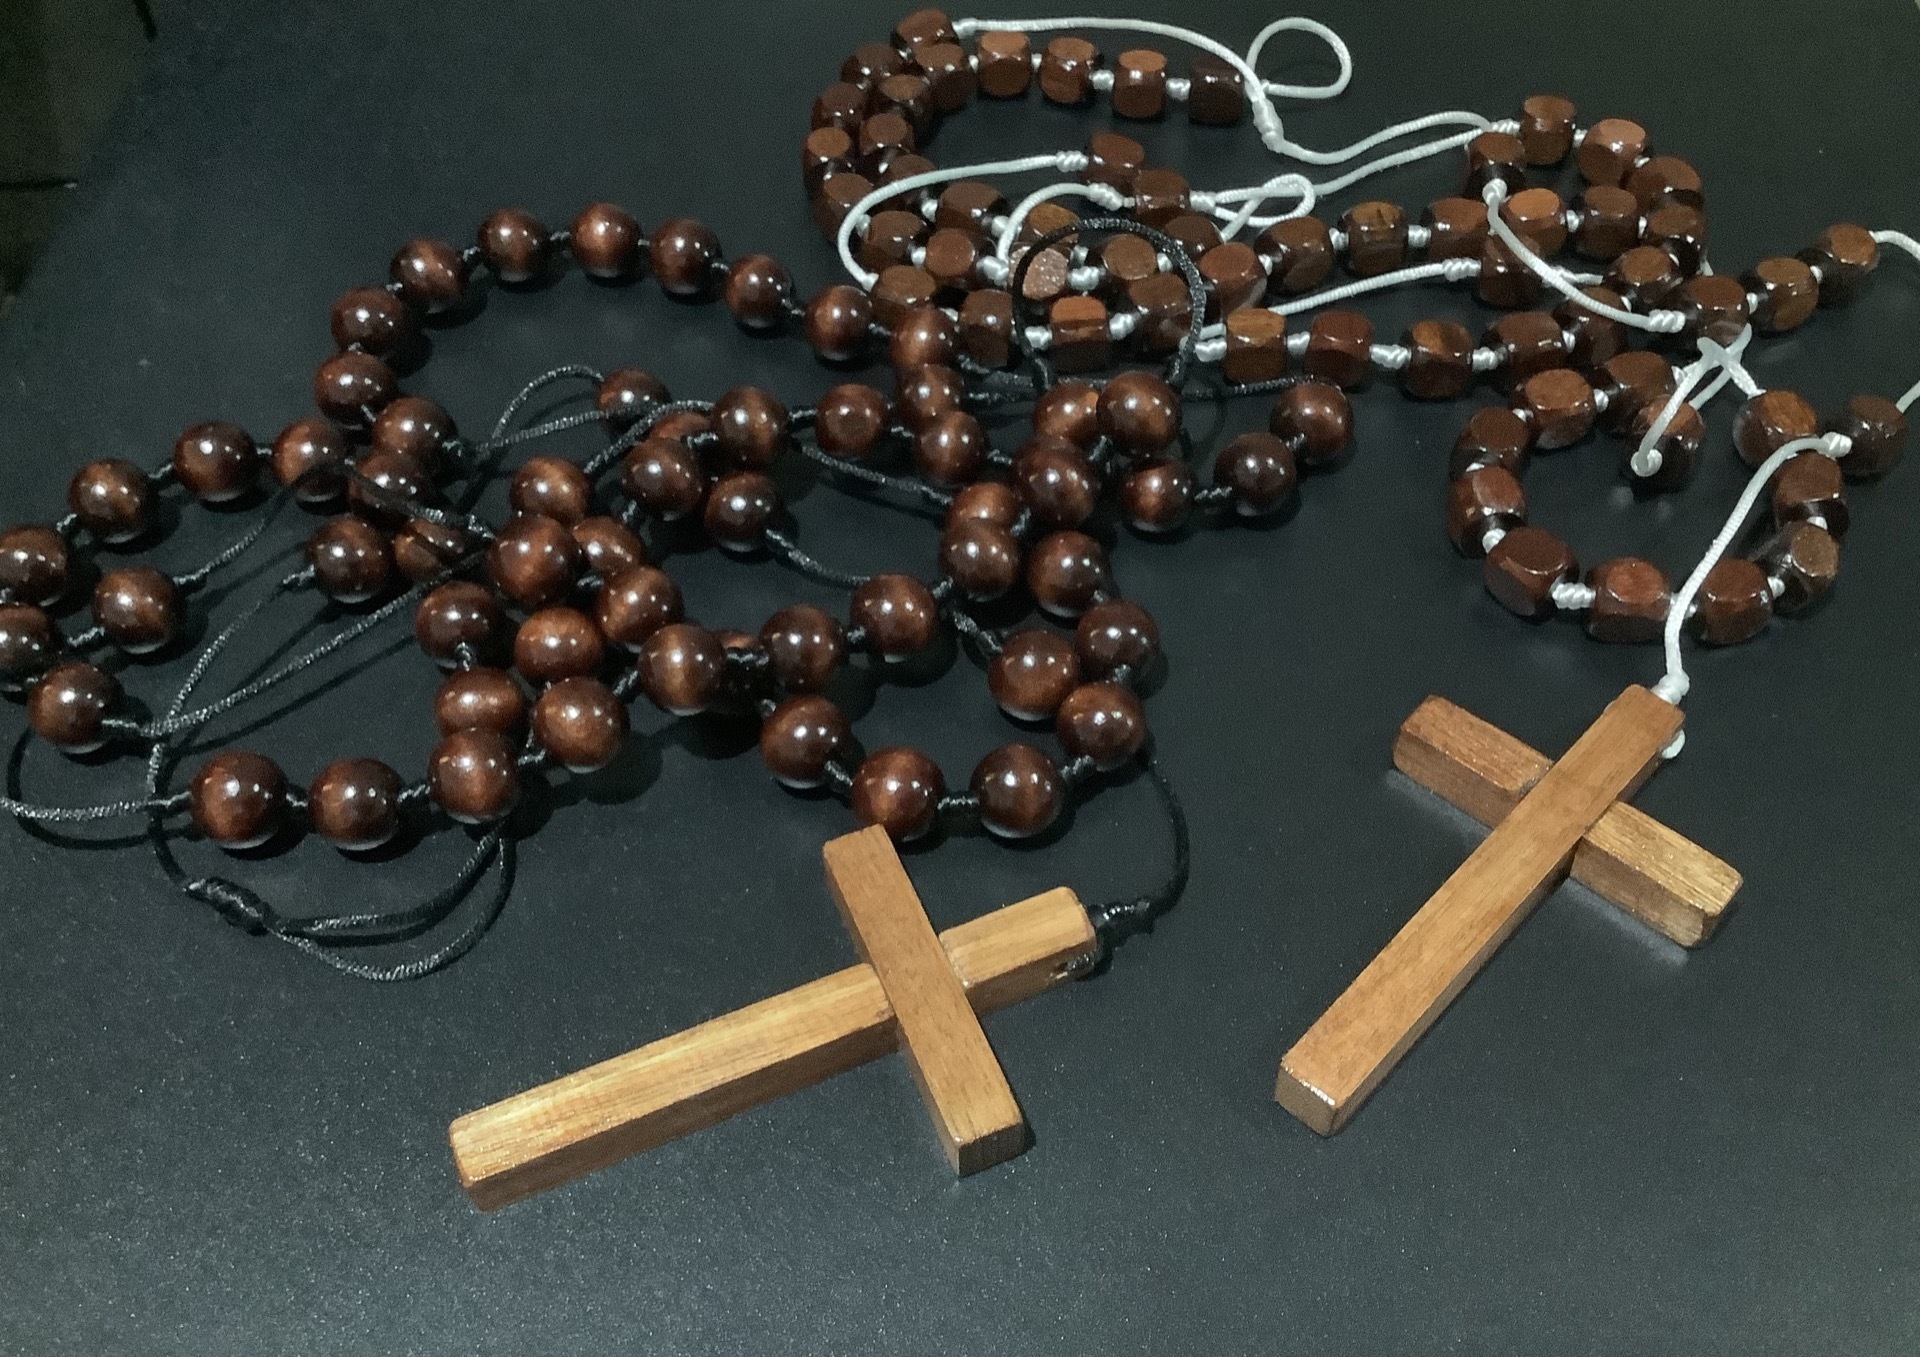
Been making rosaries to be used with a religious habit again. For them, I use beads that are typically 16-20mm in size, tied on code. Personally, I prefer to wear rosaries made from cord rather than chain for a few reasons. The most important is that they are less likely to break, though if they do, they can’t be repaired.
All materials and tools for the Rosaries
This is everything I need to make two pairs. Two packets of beads, two crosses, and the cord along with the super glue to seal the knots at the end. The staw (actually a balloon stick) can be used to help do the knots once a slot has been cut into one end. I did not show myself using it in the photos as it was too hard to take the photos while holding it. It is, however, easier and faster than using just figures.
A single rosary needs 5-7m of cord, depending on the size of the beads and how many times the cord is wrapped around when doing the knots.
Tying the knot, start by wrapping around finger.Tying the knot, start by wrapping around finger.Pull through the knot
To create the knots that I am using for these rosaries, you need to wrap the cord around a finger and over the top of itself, working up the finger. Then you pop the knot off and push the cord down through the loops you have just created. If you did it right, it means the ends of the cord will be coming out opposite sides of the loops.
Finished knots around a beadFinished decade.
Once you have one done, it is just a matter of repeating until all the beads are secured into place.
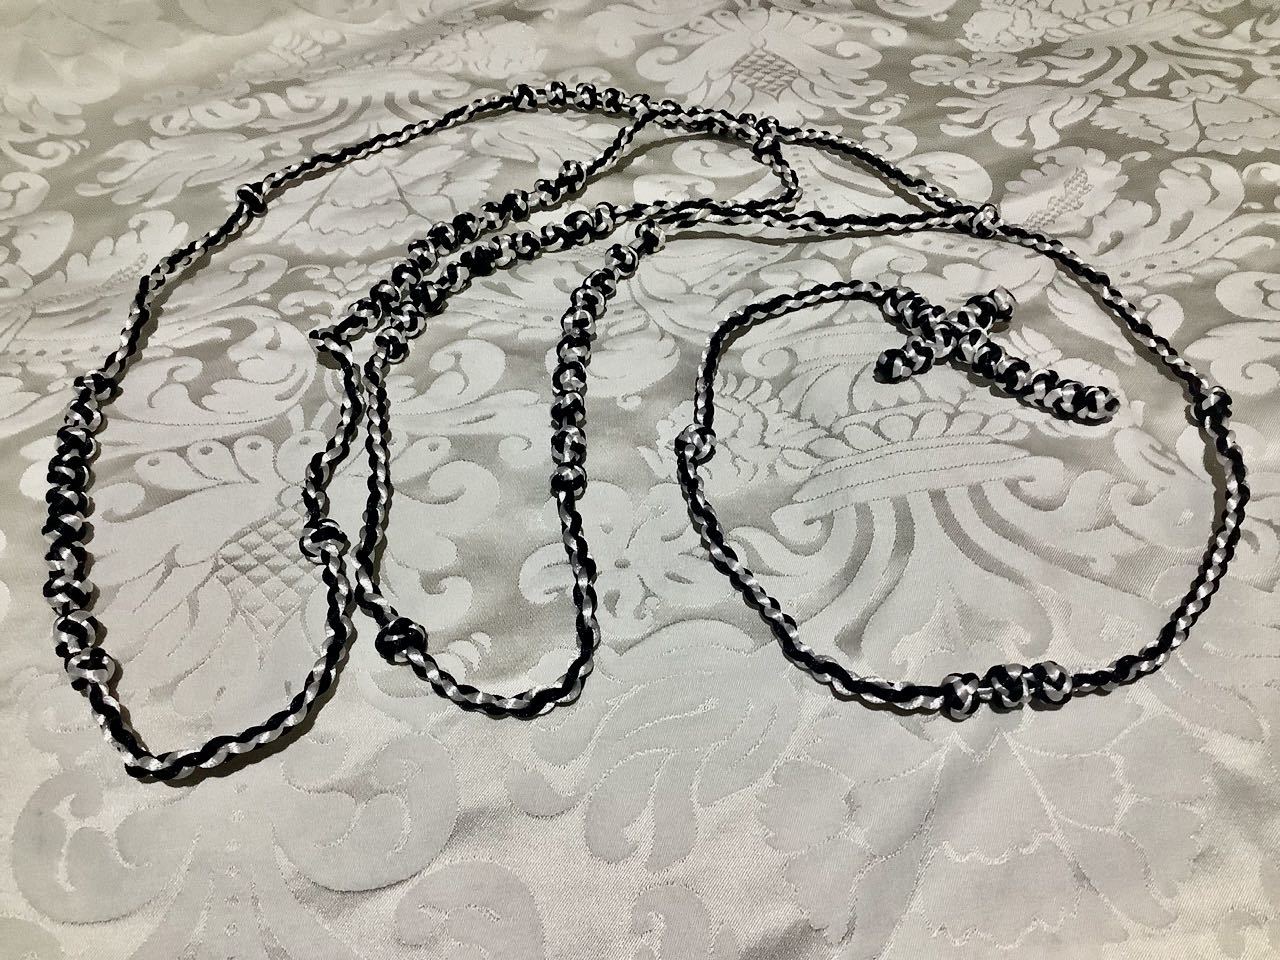
So this Knotted Rosary is like the ones I did before, only larger. I used four cords instead of two, treating each pair of black and white as one. Doing so made it much bigger. Large enough that it is the right size for a monk to wear on the side of a religious habit.
The Process
I used about 40m of cord for this, meaning each strand is about 10m long. Before I started, I tied a knot measuring how long the cord was before and after to decide how much to use. It turned out it was about 10cm, so needing to tie about 70 knots plus the sections between meant just over 8m for each strand. Rounded up to play it safe, but at the end of the project, I can say 8m would have been perfect.
With the cord cut, I tied it in the middle with another scrap of cord (you can see the red cord in some of the photos below) and started weaving the first section. I used what on YouTube I saw called a “four-strand round braid”. I got a lot better at this as I went. You can see in the photo where it shows the rosary being joined in a loop. One section is significantly better than another. To do the braid is easy. First, arrange the cords black-white-black-white and then start swapping the position of the two black, then the two white, and repeating.
The Knots
The knots were a pain, and I probably will never repeat this, even though I was happy with the result. I had to wrap the cords up because 40m cord loves to get into knots. This meant I had to push these cord reels through the knot loops as I was tying them, which was tricky and messy. It was challenging to do unless I was sitting at my desk.
Also, the knots did not look good if I let the two cords I was treating as one get wrapped around each other inside the knot, so I spent a lot of time straightening them out as I tightened the knots. Another difficulty was my use of four strands that kept trying to wrap around each other unless I kept them in position on the desk as I was working. It was often just more frustrating than enjoyable.
Finished Result and Photos
So very happy with what I got, but this will be a one-off. Not the last of the Rosaries that I plan to share here. I got four pairs I want to make from beads and chains and a few others using much more straightforward knots with beads.
Wearing the RosaryThe Finished Rosary to be used with a Religious HabitThe Cross partly madeA good look a the section of woven cord between a decade. The separate six knots are to be used to make a cross.Rosary joined into a loopAbout to join the rosary into a loopThe knots are about 1cm eachWeaving the cords together between the decadesA completed decade.The reels of cord, along with a partly tied knot
This is my first post on a new WordPress site. I was posting a little on Facebook, but I have been trying to avoid social media. So if I set things up correctly, it should also be automatically shared there.
This image is of some Knotted Rosaries that I made. They are using a knot called “Chotki.”
There is a fascinating history and facts about those knots typically used in prayer ropes, which I used for these rosaries.
St. Pachomius, in the fourth century, is believed to be the inventor of the prayer rope. They were an aid for illiterate monks to accomplish a consistent number of prayers and prostrations in their cells. Prevcounteds would count their prayers by casting pebbles into a bowl, but this was cumbersome and could not be easily cd about when outside the cell. The rope made it possible to pray the Jesus Prayer unceasingly: “O My Lord Jesus Christ have mercy on me a sinner”, whether inside the monk’s cell or outside. Following St. Paul’s injunction to “Pray without Ceasing” (1 Thessalonians 5:17), the monks prayed this way.
It is said that the method of tying the prayer rope originated from the father of Orthodox monasticism, Saint Anthony the Great. He started by tying a leather rope with a simple knot for every time he prayed “Kyrie Eleison” (“Lord have Mercy”). Annoyingly the Devil would come and untie the knots to throw off his count. He then devised the way – inspired by a vision of the Virgin Mary Theotokos – of tying the knot so that the knots themselves would constantly make the sign of the Cross. Today prayer ropes are still tied using knots containing seven little crosses tied over and over. The devil could not untie it because the Sign of the Cross defeats the devil.
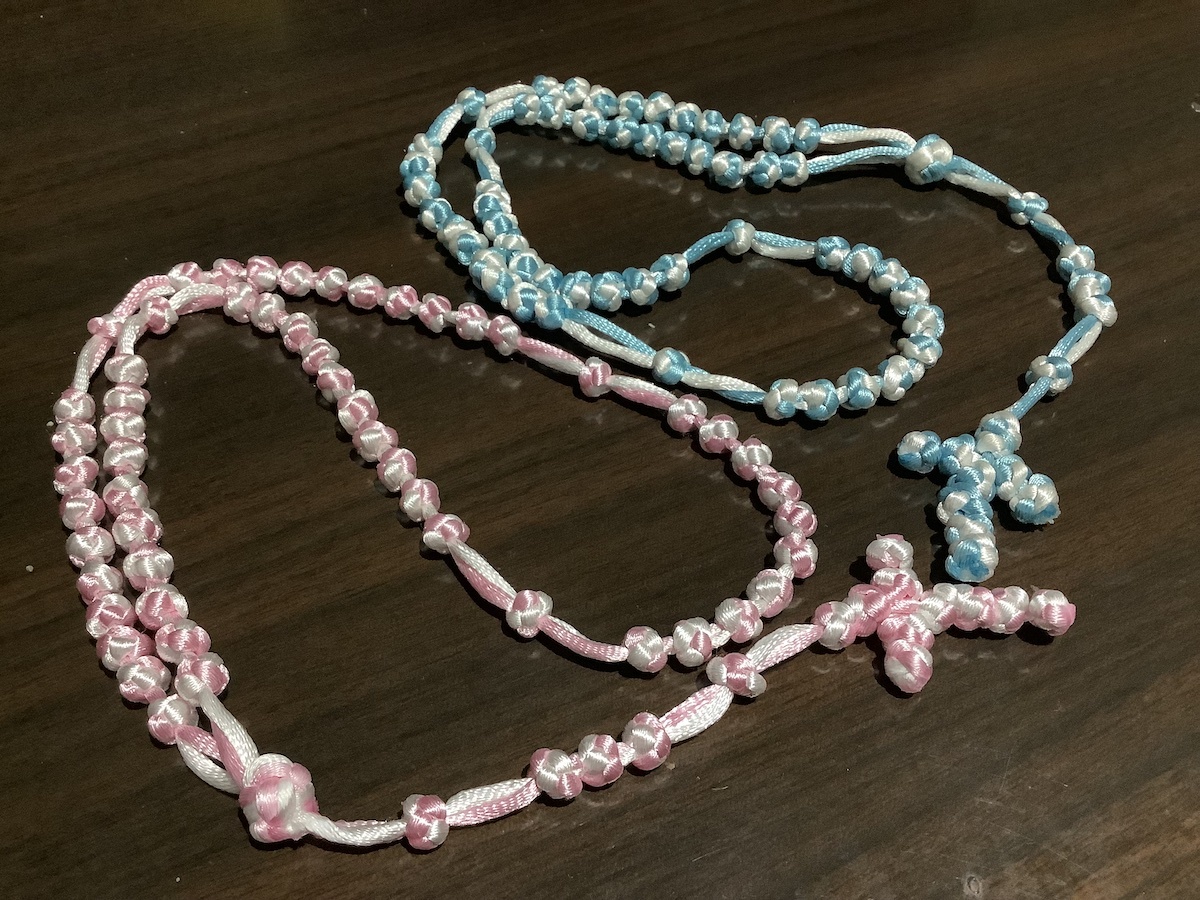
Bracelets
Since it would be a shame to waste any off-cuts of cord, I have been turning those into rosary bracelets. Not that it costs much from where I have been getting it, which is here https://www.koch.com.au/satin-cord