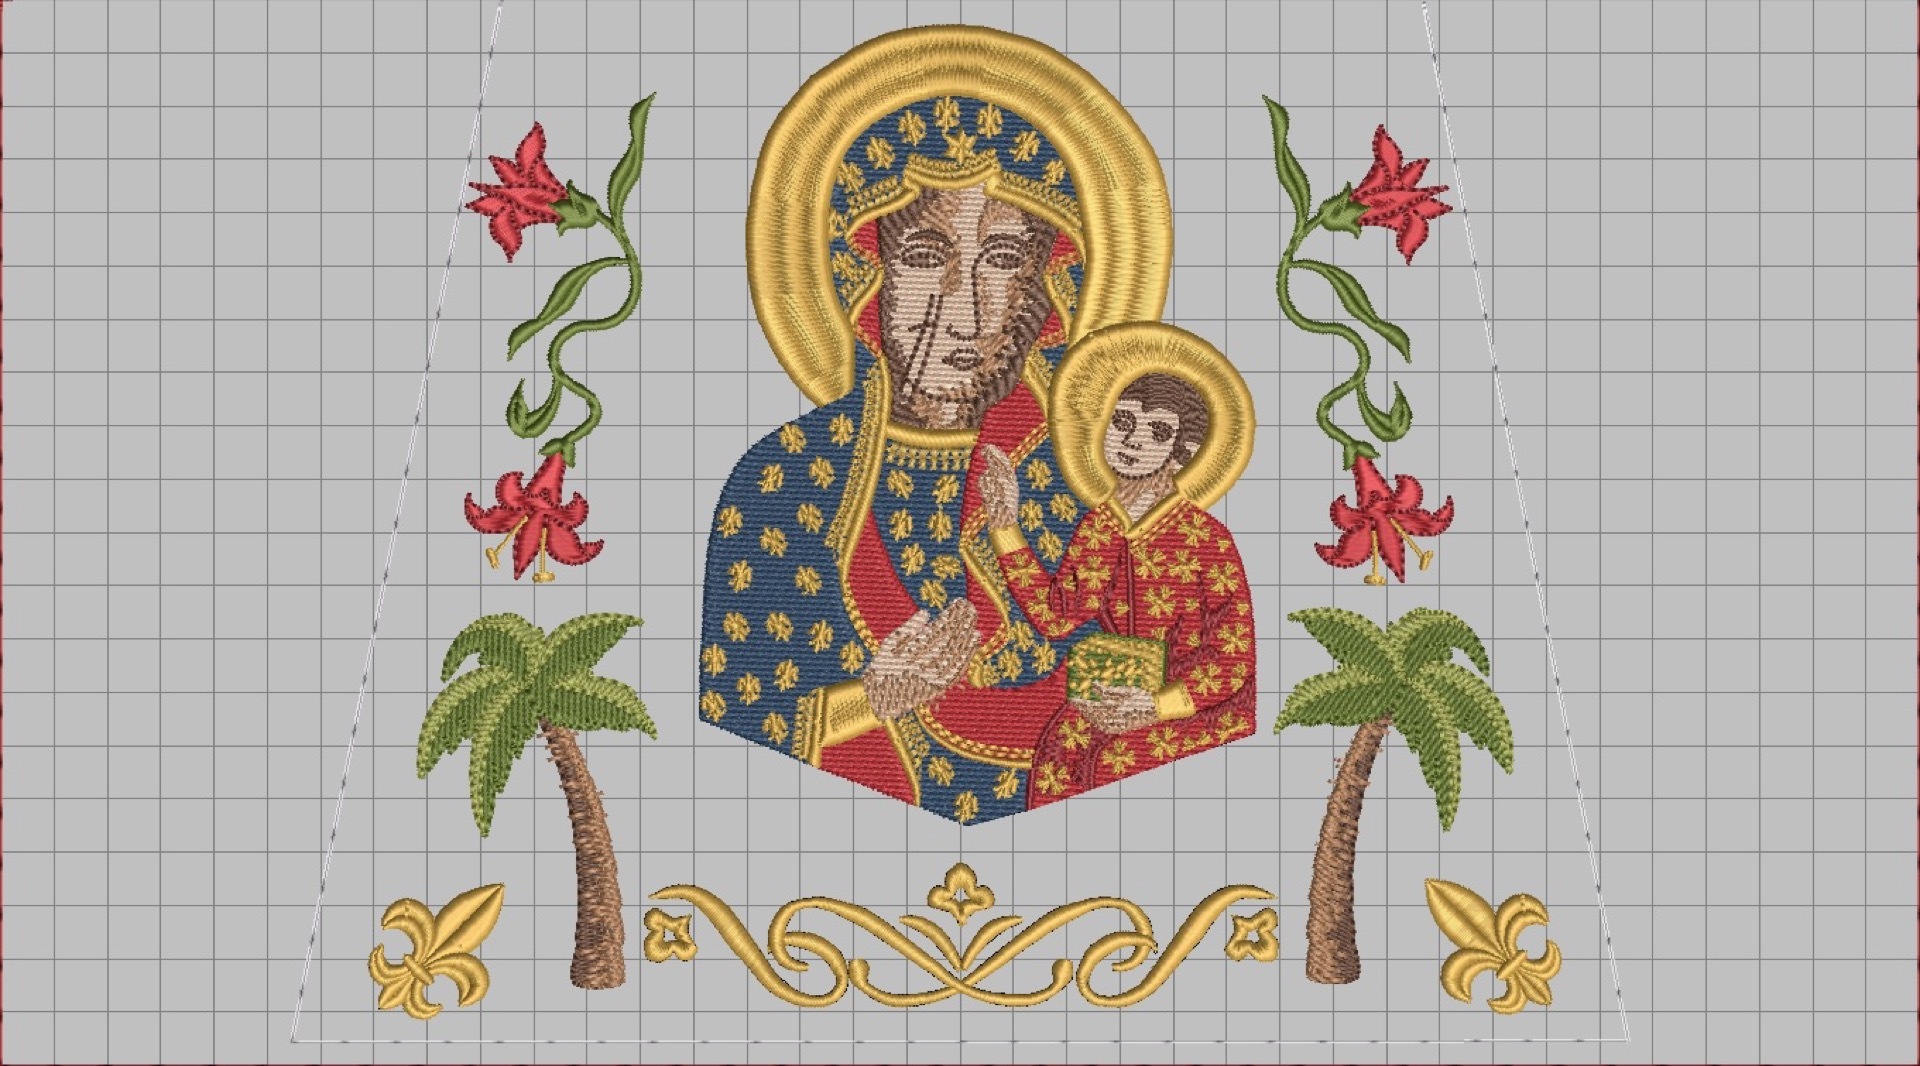
I am soon looking to create some Embroidered Stoles. So far, I have finished the design work. Here are the computer renders of the embroidery.
And here are each of the parts once they have been separated into each section, which is sized for the largest hoop I have.
Will report back with the finished results once I have stitched this out. The plan is to make the stoles out of the velvet I used for the chasubles I posted about recently.
It has been way too long since I posted here. Not because I have not done anything I could, but for other reasons. I am going to try now to catch up on sharing.
Today’s post is about my project of making custom embroidered chasubles. I shared the first images of this on the Facebook page quite some time ago. I have now finished two sets of these Chasubles; the first is a less solemn version, which you can see below.
I have finished 4 of these now. Personally, I felt it was a great achievement after having, over the past few years, tested and stitched out the patterns then go back to the design tool to edit them all over again to get what I wanted. There have been many iterations of each design with continued little edits.
These, though, were just a stepping stone towards what I finally wanted, which was a solemn set for the celebrations of the different feasts that are very important to the Order of St. Paul the First Hermit.
I started with these Chasubles from Gruppo Liturgico: https://www.gruppoliturgico.com/en/prodotto/chasuble-39/ and then started embroidering onto white upholstery velvet (only non-stretch velvet I could find). And with some help from a friend, I was able to sow it all together. Images below, which I will leave the reader to judge.
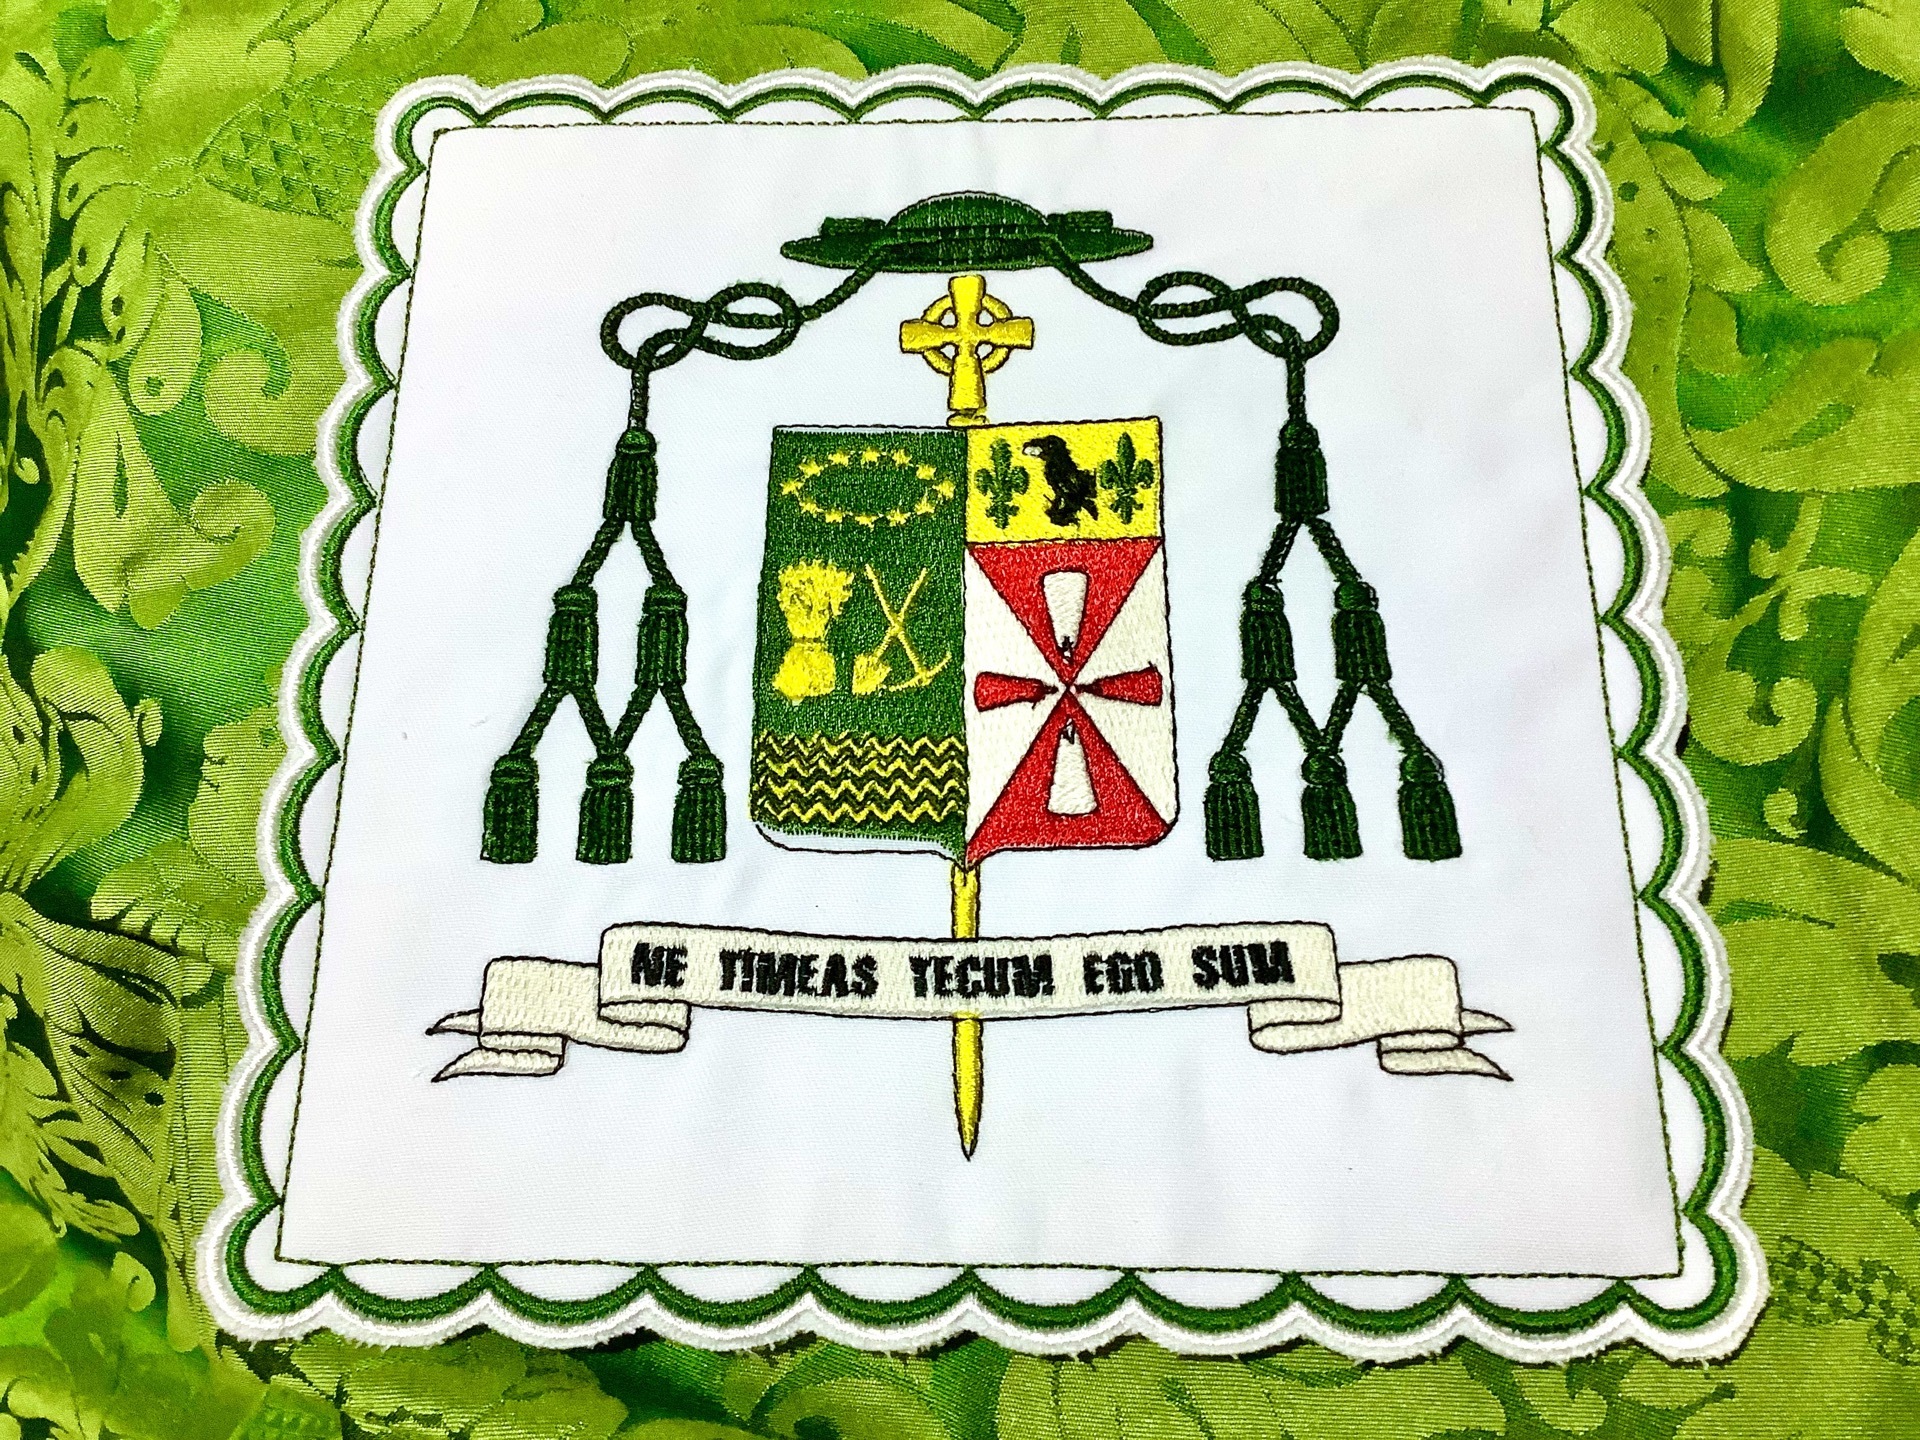
Another embroidery that I did this last week. This time at a friend’s request, it is a bishop’s coat of arms. This time I could start with a high-resolution image from Wikipedia.
Bishop’s Coat of Arms DesignBishop’s Coat of Arms Design RenderBishop’s Coat of Arms Stitched
Above you can see the original artwork, what the embroidery design program thinks it is going to turn out to be, and then the final stitched product.
A little work had to go in after the automatic digitization of the original design. It leaves a lot of holes in, for example, the green and yellow background, which can cause problems of too many tiny stitches or lack of alignment, so I filled those in. Some of the smaller details were probably not going to work, so I deleted some of them. I also spent a while reordering the objects, so they were stitched in a more sensible order, or otherwise, it spends all its time casting off and moving to another area.
Still not perfect; there is a gap between the green area and the black lines above and below it. One of those things I would forever notice, but others might ignore or not notice. I could allow more pull compensation to fix this – lots of stitches in one direction tend to pull the fabric in, even with a stabilizer behind it, so the object can be extended in that direction to counter. Or maybe try changing their direction a little to spread the pull more.
Will I do any of that? I don’t know yet. There might have been a brief discussion about a mitre.
I wanted to share again some other designs I have been working on. These are all things I did a while ago, the stoles were done in 2020, and the palls I did back in July this year.
Stoles
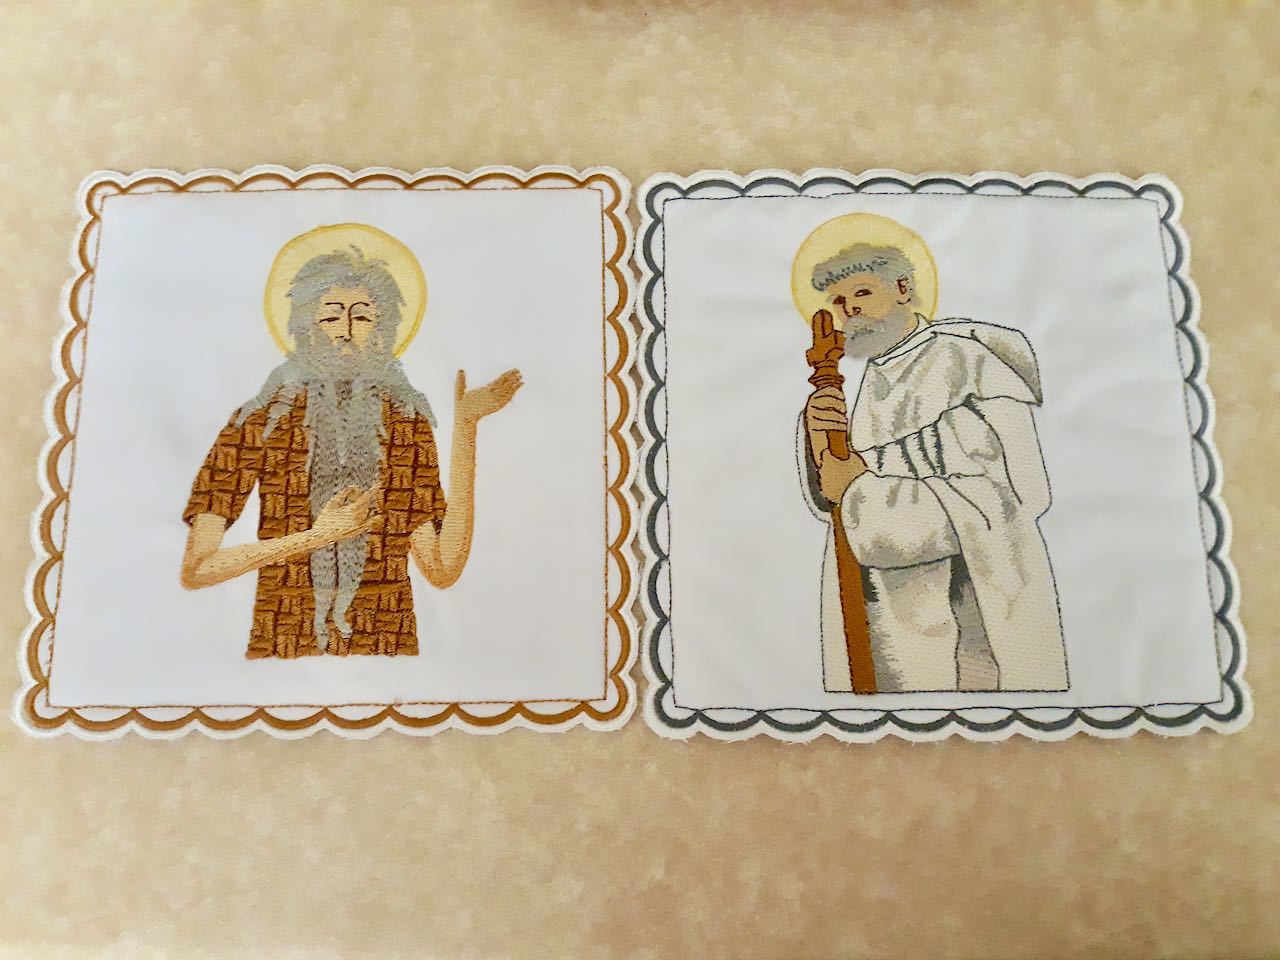
These stoles were one of the first things I started with as a practical way of testing patterns and making something that could be used. So here we have the Black Madonna and the Coat of Arms on one side and St. Paul the First Hermit and the Motto on the other.
I have tweaked all the embroidery patterns since I first did them. Looking at St. Paul on the stoles and the palls, you will notice some changes. One day, once I think I have got to a point where I will not keep changing them, I will share the machine files.
In the first image, you can see all the parts stitched onto a single piece of cloth before I cut it up to make the stoles.
Stole with St. Paul and Black MadonnaStole with St. Paul and Black MadonnaStole with St. Paul and Black MadonnaStole with St. Paul and Black Madonna
Palls
Another practical test run of some of the designs. Here I have the Black Madonna, St. Paul the First Hermit again (with minor changes) Bl. Eusebius (best first switching of a pattern so far), a few Coat of Arms, and a Coptic Cross.
In a previous post, I explained how I made the palls in more detail, so I will not repeat all those details here.
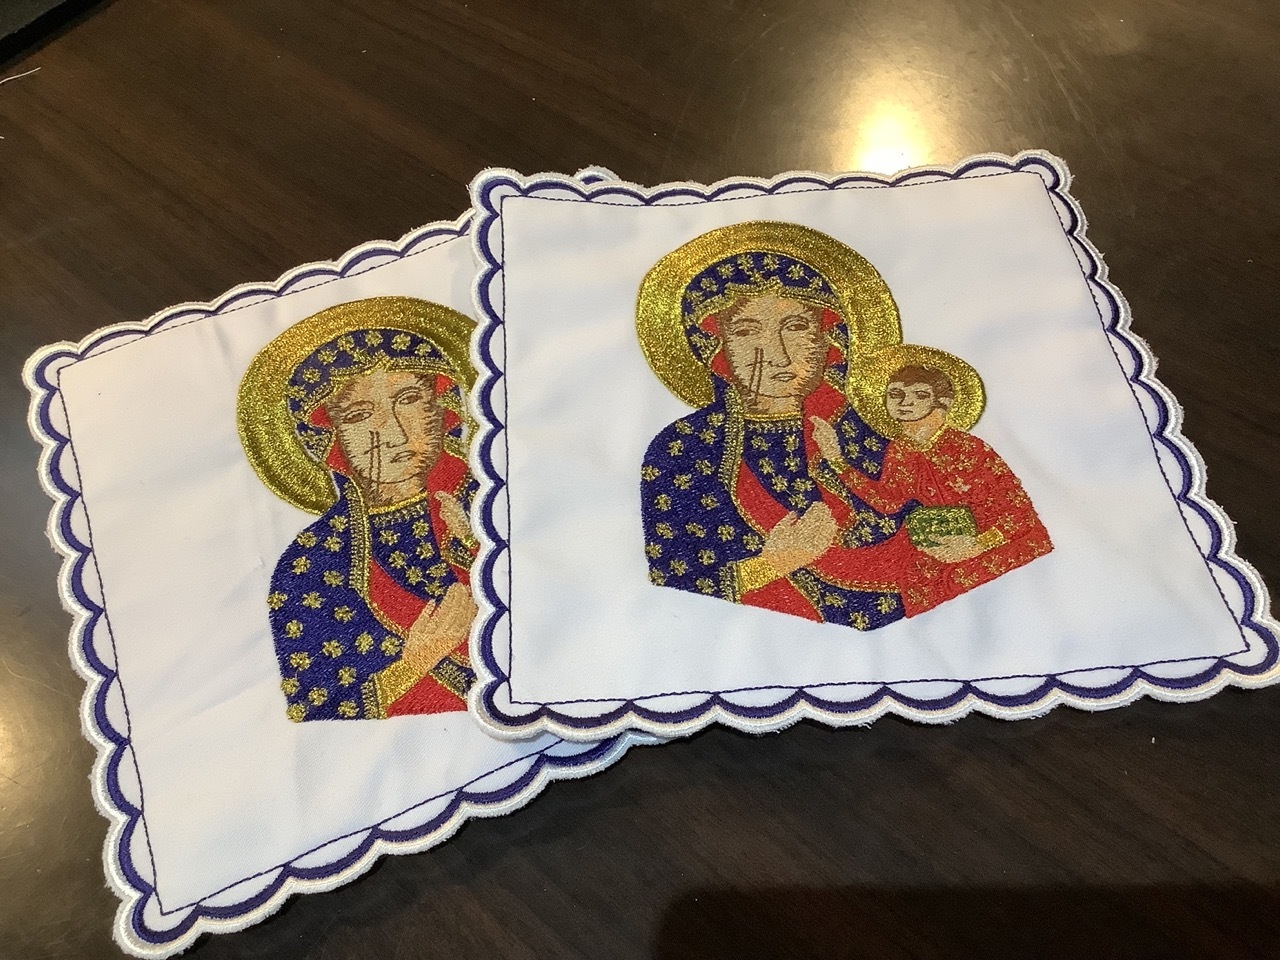
If you look up close, for example, at the Coat of Arms that has the red and gold border, you can see little gaps between where colours join, hence why I am still working on it. This one here was just how it came from Hatch Digitizer after automatically importing the artwork. On the other hand, the Black Madonna with the fleur-de-lis in the corner is a design I am almost sure I have got as good as I will make it after a few trials (also one I painfully traced out from a relatively poor quality photo).
Coat of Arms PallCoat of Arms PallCoat of Arms PallCoptic Cross PallSt. Paul the First Hermit PallBl Eusebius PallBlack Madonna PallBlack Madonna Chalice Set
The last image has the full linen set for a chalice, the pall, purification, corporal and finger towel. Here is a video of what that looks like on a chalice.
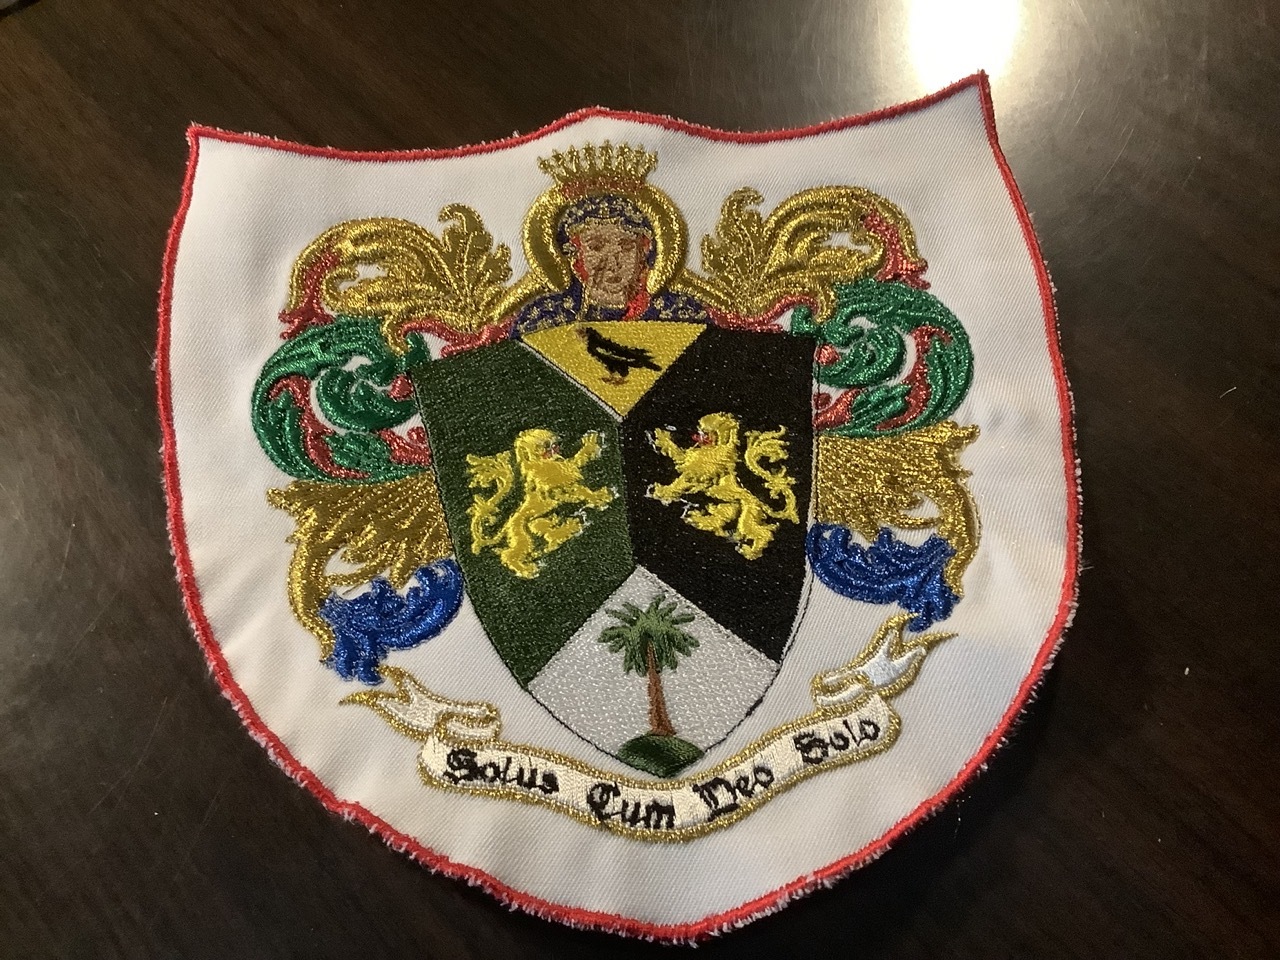
The other day I showed off the Coat of Arms patch I had made. It was not the first time I had stitched this out. I did so previously and sent the result to a priest interested in using it.
So above is what he has done with it. He attached it to the bottom of a white Roman Chasuble. In this case, the priests here are celebrating a Mass for the Black Madonna’s solemnity just a few days ago on the 26th of August.
This vestment gives an example of what I want to achieve with the machine embroidery I am undertaking. I aim to have many vestments, and other liturgical items (like the Black Madonna Palls I shared) customised to the Pauline Fathers.
This pattern of the Pauline Coat of Arms is one of the most complex embroidery designs I have created. At this size, the pattern needed over 90k stitches. In addition, it uses a lot of raised satin stitch, which means it does a lot of stitches over the top of each other to create a raised effect. I also used a lot of metallic thread for the embellishments around the edge.
You can also see I cut it out of what it was stitched onto. So the patch can be attached to something else later.
These Black Madonna Palls are part of a project I have been working on bit by bit for a while. It started when my mother asked me to do something with her new Embroidery machine. It was all computer automated, which was not so great for her, but perfect for me. So I set out on my mission to make some customised vestments. I just had to save every penny I could to get my machine. This post is about just a little bit of that project.
The creative part of the project is designing the patterns. I create the patterns on the computer with a program (with no sowing machine needed). You draw your shapes, pick your colours, stitch types and effects, and even the direction the stitches go in. It is kind of like drawing something in Photoshop, except because it is a mechanical process to “print” it out, you have to be aware of some pitfalls. Like picking a high stitch density will make a nice rich colour. However, it will pull the fabric more, causing things to misalign. I have been slowly learning those pitfalls through trial and error.
Anyway, here are some photos of it in progress on the machine. I like how it looks once the gold thread starts being done. Unfortunately, the gold thread is a pain to work with, as it is more fragile and breaks easier. So I end up having to rethread a few times. It is worth it, though.
Pressing Start to See the Result
Black Madonna Palls in progressBlack Madonna Palls in progressBlack Madonna Palls in progressBlack Madonna Palls in progressBlack Madonna Palls in progressBlack Madonna Palls in progress
I also recorded some of it in the video. The video has been sped up 8x.
The machine only can take one colour at a time, but it guides you through what colour when with its little display. It also tells you a lot of other information like time remaining and has a progress bar for the stitches.
Turning the design into a pall for a chalice, I need a pocket to put a plastic or cardboard square into. So everything out of the hoop, tape another piece in place so it will not move, and a third to cover the gap. Put the original back in the frame, make sure it all lines up, and it is back on the machine to do a border.
Putting the backing into the hoopA second piece to cover the gapPutting the Black Madonna back in
Finished Black Madonna Palls
Then we have a final result. After that, we need to trim the edges and repeat.
The pall edging completedCompleted Black Madonna PallCompleted Black Madonna Palls
Palls are just a nice-sized project for testing patterns while making something useful. There is a lot more where this is going.